Watch how YouTuber Explore Bound sets up his 4WD DMAX to go off grid using iTechworld products.
Watch the video
Read the transcript
Hey there, welcome to episode two of this canopy fit-out project! Today, we're going to be installing the entire 12-volt setup from scratch. In episode one, we installed the Bushman 85 litre upright fridge freezer combo into the canopy setup which I'm absolutely loving, but at the moment, it has no power. And a fridge is no good with no power, so let's get started.
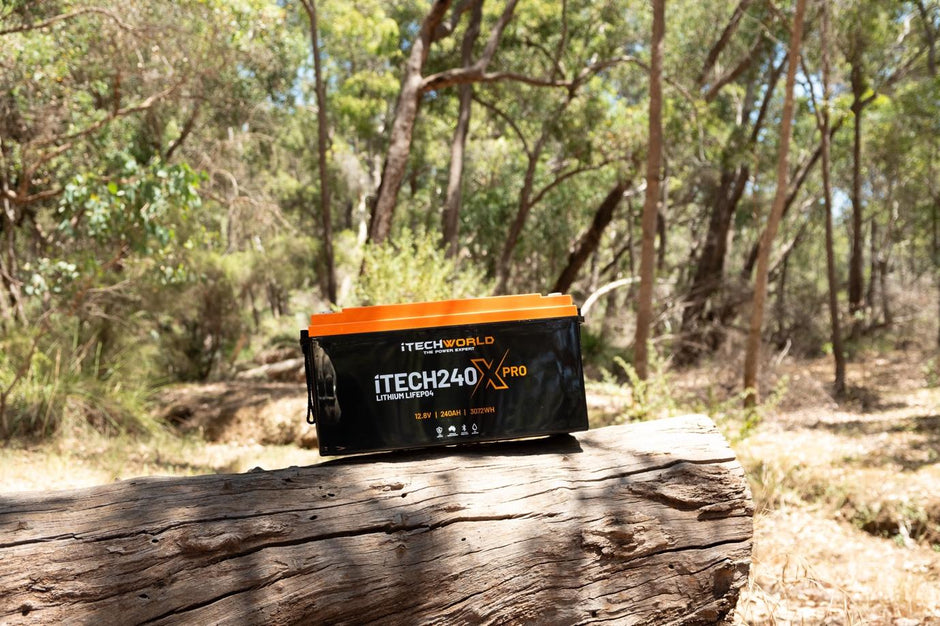
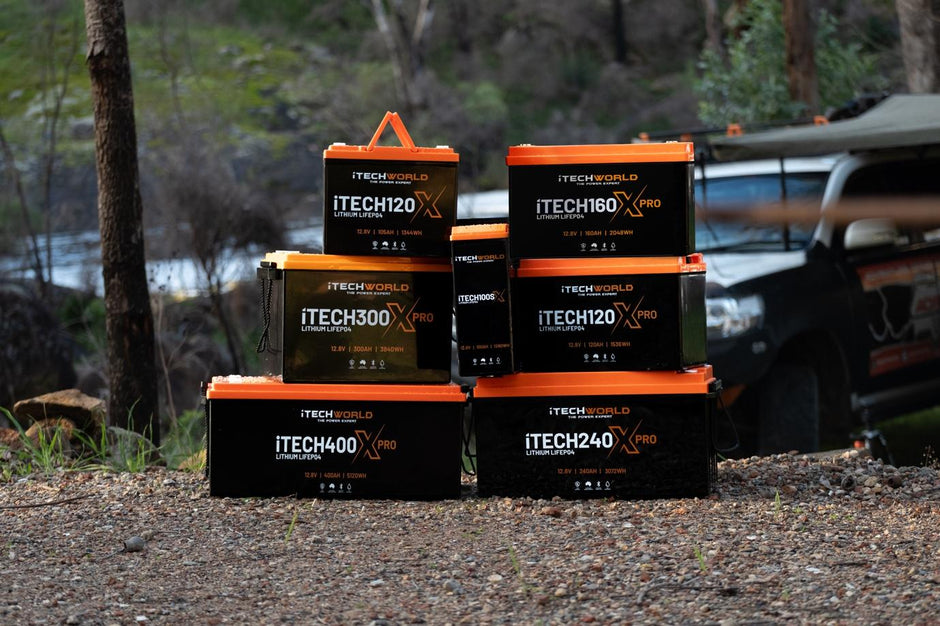
My plan is to do a pretty straightforward electrical setup in this canopy, but even the more simple setups still require a lot of bits and pieces. The heart of this whole setup is going to be my iTechworld lithium battery. Of course, this is the one I had in the ranger, but I had to take it out and bring it across to this new setup because it is such an awesome powerhouse and should run all our accessories with no dramas whatsoever.
To charge that battery, we've got the iTechworld 40 amp DC DC charger, again, the same one from the ranger which is awesome. 40 amp being the bigger of their two DC DC chargers, so this should charge that battery in no time. To get power from the main battery into the canopy to run the charger and then charge the lithium battery, I might have gone a little bit overkill but I've bought 100 amp twin sheath cable. This stuff is more than up to the task of getting plenty of power into that DC DC charger. Being a 40 amp, you do have to use relatively thick wiring, but this should well and truly be overkill, which is always the way you want to go. I have bought two packs of it as well, one pack is five meters and it might just be enough, but just one of those things if I bought one pack I'd need a second pack, but now that I bought two, I'll probably get away with just the one.
As for running fuses in that cable, obviously, you need two, one at the main battery end and then one at this battery end. So, I bought these two jumbo fuse holders, rated to 60 amps which is plenty because the DCDC charger is 40 amps, and then of course, I bought two compatible fuses to go in those holders as well, again one at each end.
For running power within the canopy once we've got it to the battery, I just bought some 15 amp cable, again just from Supercheap Auto, and that should be more than up to the task of running lights, USB charge sockets, and other small appliances like that. I'm going to be distributing power within the canopy with just one of these little fuse boxes. I actually bought this years ago with the plans to install it in the ranger canopy but never got around to it. It's a pretty cool little unit, wasn't an expensive one at all, but should get the job done. Basically, you just run your mains power feed in here, then you can plug fuses in and use any of those 10 outlets on the side. It's really cool.
Although this is probably going to be a two-day job, there's a lot of stuff to go into this setup, I'm super excited about it. I've always been pretty passionate about installing electrical systems, whether that's just popping a set of spotties in the car or doing a full setup like we're going to be doing today. So, let's jump across to the bench and I'll show you all the stuff that's going in this setup.
Headboards built so I can actually screw those things like dc dc charger, fuse box switches, and all that in place. I'm still waiting for a few things to come from eBay. I'm gonna leave it here for today, at least pretty happy with the progress made, and it's coming along nicely. All the tedious stuff's out of the way now, and the rest of the stuff is kind of the fun job.
A few days have passed since we installed all that spaghetti up on the headboard of the canopy, and in that time, I've received a lot of deliveries from Amazon and eBay. It's been like Christmas! We've now got a couple of switch panels for the headboard to control all these accessories. I've got a USB outlet panel with six quick charge USB ports, which is going to be so handy for me. I've bought two rolls of LED strip lighting - two rolls because one is just plain white color, and one is amber. That's supposed to help deter bugs and insects, so that's going to be really interesting to see if that actually works. And I've also bought a bunch of fuses for that fuse box, so it's always good to have a bunch of spares too. So I'm pretty sure that's all the pieces I'm going to need to complete this install. The next step is going to be to knock up those headboards, carpet them up, and attach them to the canopy so there's some way to attach all those accessories.

Okay, so I've got my headboard panels all cut down to size, and they fit really nicely in the canopy. The next step is going to be to attach some carpet to them. So for that, I'm literally just going to lay these panels down on this carpet that I've prepared earlier, just some marine carpet I bought from Bunnings. Then I'll take my trusty chalk marker and draw a line about an inch around the outside of the panels. Then I'll cut the carpet out to size, use my Selly's Quick Grip Contact Adhesive to stick that carpet to the back of the panels. This stuff's really good for sticking carpet pretty much anywhere. And once that's stuck, I'll fold the excess around the back and then staple it to keep it in place.
As you can see, my headboard panels are finished, and I am so happy with how they've turned out. That Selly's Contact Adhesive has worked really well, and the carpet is all stuck down nice and tight, which is fantastic. I've also carpeted these little 12-volt control boxes that I built as well. Really happy with how they've turned out too. They've got some cutouts pre-made for my little switch panels. So on the driver's side, we have a little two switch panel there, and on the passenger side, we have a four switch panel which goes just in there. Everything fits nice and perfectly. The next step is going to be to work out exactly where I want my fuse box to be mounted on this headboard and also my DC-DC charger as well. I'll get those screwed down, get the wires poked through the back, and then get these installed in the canopy.
It is currently 11:32 p.m., very late. I'm absolutely exhausted, but the 12-volt setup is completely finished. Everything's working, everything is looking super neat. I'm absolutely stoked with the result, but I'm also very, very tired. So, I'm going to put all my tools away, get a good night's sleep, and I'll give you guys the full tour tomorrow morning.
So, after a few really long days and even longer nights, the new 12-volt setup is fully installed and working a treat. It did take a bit longer to finish than I was expecting, which seems to be a running theme of this canopy fit out, but I mean, I'm not a professional, so a lot of the stuff I was figuring out as I went along. I was trying not to cut any corners and just get everything done to the best of my ability. Anyway, let me give you a tour of the new setup.
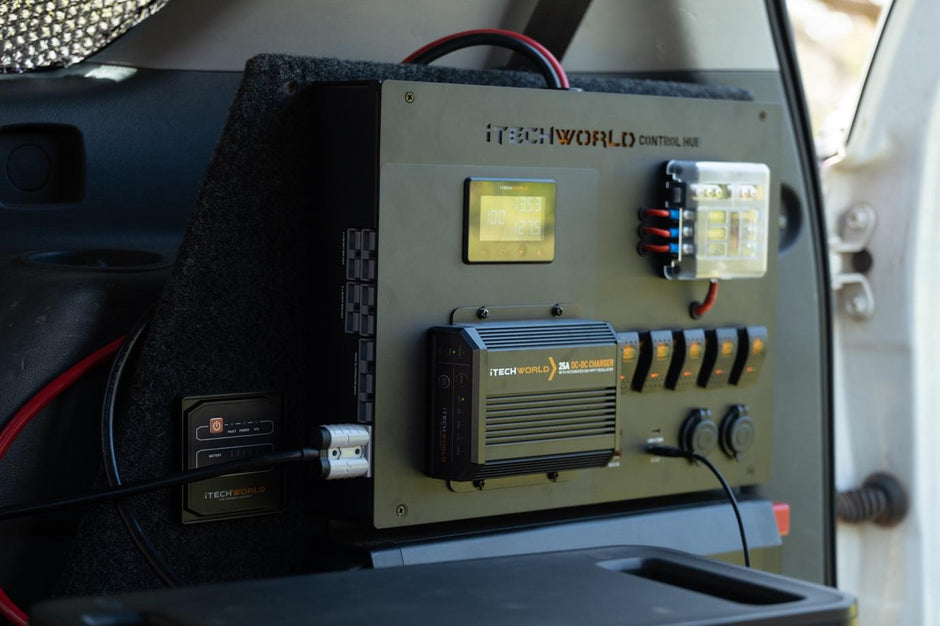
Starting from the top, we've got the 40 amp iTechworld DC-DC charger to take care of charging that lithium battery. Got it mounted nice and high, and yeah, being the 40 amp model, this should charge that battery nice and quick. All the cabling is run behind this headboard, so from there runs down there behind the headboard, comes out there, and goes to the battery mounted behind the fridge. Now, the battery is, of course, the iTECH120X 120 amp power lithium battery. To mount it, I've basically just put it on this nice thick anti-vibration matting to keep it nice and safe on corrugated roads, and then I've strapped it down to the canopy floor with these really strong tie-down points, one at the front, one at the back, and then a ratchet strap over the top. That power is then distributed through the canopy through this fuse box I've got mounted up on the headboard here. This is a really cool piece of gear, actually. It's got 10 different outlets. Obviously, I'm only using five at the moment, but when a fuse blows, it has these little signal lights to show you which fuse has blown. Just takes a lot of the guesswork out of solving problems out on the tracks.
The last piece of the puzzle for the driver's side of the canopy is this little control box I've made up here. Now, this houses a 12-volt outlet and also two switches. I've also run nice thick cabling to that 12-volt outlet, so if you ever wanted to run a dedicated freezer on this side of the canopy, I've tried to provision enough room in this space here for that, and that socket is going to provide more than enough power. The outside switch runs the white lighting inside the canopy, and the second switch runs the amber lighting. That way, if we're ever camping somewhere where there's a lot of insects, which seems to be pretty much everywhere you go camping, I want to access this drawer. We can just flash up that amber lighting and not be bombarded by insects. Anyway, that's pretty much everything from this control side of the canopy. Let's jump around to the fun side.
Moving around to the main side of the canopy, I've got a little control box module that I've built up to house pretty much everything I'll be using regularly while out camping. So up on top, we've got a four switch panel. These first three switches all operate lights. The first switch operates the white lights outside, the second switch operates the white lights inside, and the third switch operates the amber lights inside and outside. The adhesive backing on that LED strip lighting really let me down, and it just wouldn't stick to this matte black finish on the canopy doors. So, to try and solve that problem, I have put a few blobs of super glue along the light strips, and I've sticky-taped them in place for now. So, fingers crossed they stay put once I remove that tape.
Moving along my switch panel, the fourth switch operates a USB power outlet panel down below. This panel gives me six USB outlets, which I am so keen for. I've been making do using just two in the old setup for literally years, so I'm very, very happy to have some more outlets, including one quick charge for USBC outlet as well. So, I've got a laptop and also a tablet that both charge off USBC, so it's gonna be awesome to be able to charge those in the canopy without needing an inverter.
Moving down to the bottom of this panel, we find the iTechworld lithium battery volt meter. So, I can keep an eye on my battery and make sure I'm not draining it with all those USB outlets. And, of course, my fridge now has power too. I've run it back to that fuse box, and I can finally start using it. And with that, my 12-volt setup, which is probably the most time-consuming part of a canopy fit-out, is officially complete. Well, I say complete, but I find 12-volt systems one of those things you're just constantly chopping and changing and refining as you go along, but I'm quite happy with this as a V1. It ticks all the boxes for me, and it turned out pretty much exactly like I had planned, which is always a good sign.
So, I hope you guys are enjoying this canopy build series. There's a whole lot more still to come. I'm thinking the slide-out kitchen build will probably be the next episode because my draw runners arrived last week, and they are super heavy-duty, and I'm very keen to start that build. Thank you so much for watching. Leave any questions you guys have in the comment section down below. I'll get back to you as soon as I can, and I'll catch you guys in the next one.