With a the right tools, some knowledge and a lot of common sense, you can get to work on your RV’s 12V system.
With all the advancements in the RV market and the seemingly endless quest for gadgets, can the average Joe still work on their RV electrics? The answer is yes, as long as you take a few key factors into consideration.
240V CABLING AND DEVICES
Mains supply 240V in RVs is still a major energy source and one to be treated with much respect. Generators and high-powered inverters can supply 240V in addition to mains power. All wiring should be done in line with Australian Standards 3000 (general) and 3001 (specific to RVs). There are some special requirements for RVs, including double pole powerpoints, earthing and tagging/testing on power leads. Unless the 240V cables are double insulated (with thermoplastic sheathing), then they should be physically separate from 12V systems. You should not attempt to alter the 240v systems at all in your RV as it is illegal.
12V CABLING AND DEVICES
Unlike the 240V system, it is quite legal to work on 12V cabling and devices. However, it’s important to have an understanding of some of the issues, such as cable sizing, voltage drop, battery charging and connections.
VOLTAGE DROP
Many iTechworld customers think that current rating is all that matters with 12V cabling, but voltage drop (or minimising it) is equally important. Voltage drop over long runs of cable (think 3-4m as a minimum) can be a problem – note that cable length does include both the positive and negative conductors. While many consider a voltage drop of 0.5V to be acceptable, industry experts reckon a 0.15-0.2V drop (at 12V) is a much more acceptable figure. The best way to avoid voltage drop is by using the correctly sized cable and ensuring that all connections are done correctly.
12V CABLE SIZING
Cabling sizing causes considerable confusion and problems, especially in Australia. The International Standards Organisation (ISO) specifies cable sizing/rating by a conductor’s cross-sectional area, usually in mm². That is mostly used by battery and European appliance makers. An alternative way, used considerably in the USA, is AWG or the B&S system. All are good if used correctly, but the ISO sizing is simpler.
Another confusing issue is that some cable is sold with a cable rating. That refers to the maximum current a cable can handle but does not take into account the length of cable run.
It might sound extreme but there are some installations that might require a 10mm² cable or larger to be used in order to achieve the correct charging voltage – note that is not 12V but 14.2-14.4V for adequate battery charging.
BATTERY CHARGING
RV deep cycle batteries can be charged in a number of ways – mains charger, generator and solar panels for a start – but the one that many fall down on is charging from the tow vehicle. As I mentioned, voltage drop is an issue to be considered and it’s for that reason that the conventional round or flat plugs, which work well for items such as running lights and trailer brakes, are not acceptable for battery charging.
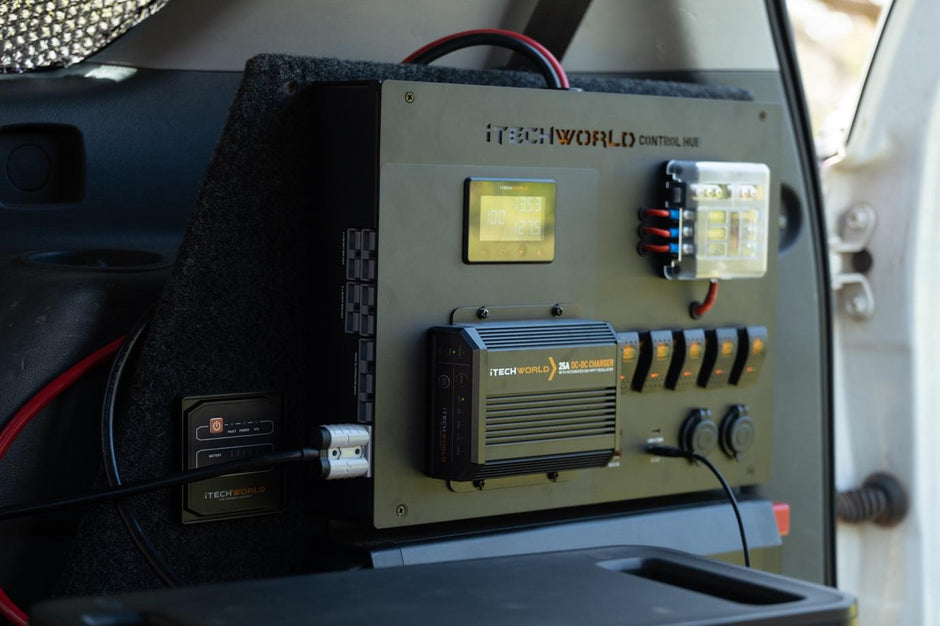
Instead, you’ll need something like an Anderson plug, which is a separate plug that can accept cable sizes such as ISO 10 or larger. Generally speaking, it’s best if the batteries are as close to the chargers as possible and, in the case of a caravan/fifth wheeler, as close to the front as possible.
FRIDGE
Devices such as 12V fridge compressors, indeed anything with a motor, are particularly vulnerable to excessive voltage drop, as are battery charging circuits. Although there are some circumstances where 12V compressor-type fridges are better, it’s sometimes better to have a three-way absorption fridge because they have the option of LP gas as well.
LIGHTING
Apart from a slight dimming, most lighting systems can accept a small voltage drop. So it’s slightly ironic that the lighting cable size can be smaller and voltage drop is less of an issue, particularly with low current LED fittings.
DO IT YOURSELF?
While the information above may convince you that DIY 12V systems are too difficult to contemplate, they’re really not as long as you have a basic understanding of all the issues.
TOOLS
You only need a basic tool kit – decent insulated electrical pliers, insulated screwdrivers, wire cutters and other handyman essentials such as a battery drill and drill bits. A 12V test lamp is good for a quick test for 12V supply but a multimeter is considerably better. Other handy items such as different coloured rolls of insulating tape and plastic cable ties are essential and a connector crimping tool is very handy for any serious work. The iTechworld Amp Meter is a handy gadget which can be placed in line to see what the wattage, volts and amps are going through your cabling.
JOB LIST
Generally, there is little that needs doing with contemporary RVs, unless it’s repair work or adding lights or 12V/5V charger outlets. However, with older rigs there’s often much that can be done – simple jobs such as upgrading lights to more energy -efficient fittings, or more complex jobs like adding an entire battery and charger or solar panel system. Whatever it is, I’d suggest that a good understanding of the issues involved before starting work is essential.
TOW VEHICLES
Connecting the trailer plug and Anderson plug in a tow vehicle can be quite simple; however, there are a number of issues to be considered. There are some manufacturers/retailers who supply a tow vehicle wiring harness kit, which makes life considerably easier, especially as the wiring harness kit can be supplied for specific vehicles.
However, contemporary tow vehicles are much more sophisticated than their predecessors and while the above might include a 12V ‘live wire’, it might not be of sufficient diameter for battery charging. It may appear to be quite simple to run a 12V cable between the Anderson plug and the tow vehicle battery for this purpose, but it’s important to consider where fuses or circuit breakers should be located and where isolating relays are needed to make sure the caravan fridge doesn’t drain the tow vehicle battery when the engine is not running.
RETRO WIRING
Generally, it’s quite easy to install aftermarket wiring in an RV. Cupboards, under-seat and under-bed areas, as well as lockers, all make good places to run cables. However, it should be well-protected from mechanical damage and preferably strapped into position. Where cabling might be visible, PVC mini trunking is ideal for that purpose. In all cases, cable runs should be as short as possible to minimize voltage drop.
For connecting cables, it’s best to use either screwed terminals and/or crimped connectors – the aim in both cases is to get a very tight connection. Crimp connector quality does vary – they are best purchased from a specialist outlet.
Does all of this sound like a bit of a challenge? In a way it is, but as long as you understand the essentials and use the right tools, the average handyman can do a lot.
Article author
Ian
ian@itechworld.com.au


